Wednesday, April 24, 2013

New Honey Bees on Pine Hill

We lost both our hives last year - so today we went and picked up a package of bees to start a new hive.
We're doing a step-by-step to share with Levi's class.  


We met the 'Bee Man' in Moultrie.
Here's the three pound package we're going to take home.
There are about 14 thousand bees in this box!
The box is made of wood & has screen on two sides so the bees can get plenty of fresh air - also in the box is a can of sugar water for the bees to eat until they get to their new home.

He's delivering lots of bees today - there are many more boxes of bees in the back of his truck.  Each box has thousands of worker bees & ONE queen.  The queen has her own special cage inside the box to keep her safe.

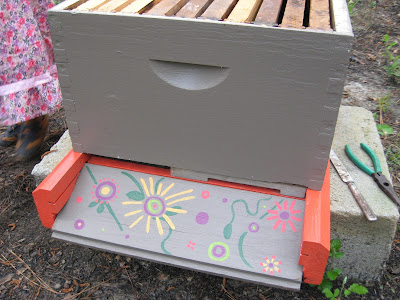
Levi putting finishing touches on the top for the hive.
We did some fun colors this year.
You paint the wood of the bee hive to protect it from the weather.

This is the base of the beehive.
The bottom is made of screen so debris & parasites drop out of the hive onto the ground.

On top of the base goes the 'hive body'.  This is where the bees will live.
There are frames inside the hive body.

Checking out the box of bees before they are put into the hive.

I use a screwdriver to pry off the lid.


Once the lid is off you can see the top of the can of sugar water.
It is blocking the entrance to the box.

Pulling the can up & out.
Once the can is out some of the bees will begin to fly out.


The can is out of the way now & here I'm pulling out the queen cage. 

The queen is inside this little cage - though it's hard to see her because other worker bees are clinging to the outside.  They are attracted to her special smell.  A candy plug keeps her from getting out.  Over a few days the workers will eat away at the candy & she will be free.


Here I'm putting the queen cage in the hive.


After a little work, I've got the queen cage secured inside the hive.
Now it's time to dump in the rest of the bees.

This is really the fun part - you turn the box upside down & shake out all those thousands of bees!

Putting all the frames back in the hive.

The hive has an inner lid & outer lid that goes on top.

Done!
The yellow cup on the front is a feeder for the bees - they will need sugar water until they can make their own honey.

I put the box in front of the hive so all the remaining bees in the box can crawl out & find their way into the hive with the rest of the bees.

Thursday, April 18, 2013

Soil Blocker & Market Day

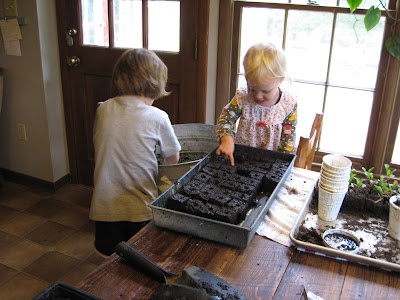
This new little gadget has seen a lot of use in the last 4 months.  I've made 100s of soil blocks this winter/spring.  This is Levi's first try at filling a tray on his own.  He's been asking me to use it & it may turn into a case of be careful what you wish for (sort of like when driving the lawnmower sounded like fun...).


This is a little pet project of mine that I'm going to check in with time to time.  These are Poblano (when fresh) pepper seedlings (called Anchos when dried).  They're the pepper usually used to made chile rellenos.

Today was my first "Market Day" with the Red Hills Small Farm Alliance's online farmer's market.  I spent all morning washing & packaging the goods.  Above is thyme & oregano. 

Washed Swiss Chard ready to package.

My lettuce mix.

A 'garden salad pak' - mixed lettuces with a carrot/radish pack.

Packed & ready to travel.


Sunday, April 14, 2013

Sunshine

potting setup in the kitchen - helper ready

potting on some squash seedlings


Chard in so many pretty colors.  Well, I finally did it, we are now part of the Red Hills Small Farm Alliance, and this is our first week listing on the on-line farmer's market.  Some of the chard has already sold.


Curly kale for sale.


Joe & I spent a good deal of time yesterday preparing for an organic stand of Cherokee White Eagle corn.  We used 2 cubic yards of mushroom compost.  Joe laid out 9 seventyfive-foot rows. 


My 'bed' garden looking like spring!  58 tomatoes in.


A game (or three) of Candy Land while I fix supper.

She just lays there - we step over.